Showing posts with label DIY Crafts. Show all posts

Saturday, December 24, 2016

Christmas Crafts - Calligraphy Cards and Reindeer Hot Chocolate

Christmas is around the corners and even though in Vancouver we have slush and ice left and not much snow, it is still Christmas time.  It is not too late to make some calligraphy cards and reindeer hot chocolate for gift giving.  

With the calligraphy holiday cards, they have one word each on the front.  LOVE, PEACE, JOY.

Supplies:  blank cards from the dollar store, calligraphy pen, and ink.  

I have taken calligraphy classes in Vancouver from Fox & Flourish, and the Westcoast Odessey of Letters conference.  

I have also found the calligraphy tutorials and practice sheets on the Postman's Knock to be helpful.  

Once you have the tools then it just takes practice and the best is to make the card with love instead of perfectionism.  After all they are handmade card and that's already ready more personalized than store bought.


Next are these cute hot chocolate reindeer.  I was lucky because my girlfriend was already making 50 of these for her family and friends and had already bought the supplies when I decided to make a few.  She kindly said we could just make them together as he didn't need 50 reindeer and since I only needed 8 reindeer, it worked out perfectly.  It was great to be a part of the factory line and learn how to make these Hot Chocolate Reindeer cones.  

Supplies:  hot chocolate mix, mini marshmallows, chocolate chips, brown pipe cleaners, googly eyes, red pom poms, treat piping bags.  

There are several blogs that have the full how to for making these hot chocolate reindeer and also free printables which I should have included as not everyone actually knew what they were.  Ahh, it is the thought that counts. It's an added bonus that they look super cute!  

Reindeer Hot Chocolate Printable
Reindeer Hot Chocolate Instructions


Monday, December 05, 2016

Vancouver Event: 4Cats Mug of the Season Workshop

Last year I bought in the Entertainment Book and knowing that it would expire at the end of December, I explored it to see what else I could use before the land of Entertainment book coupons ended. 

That's when I discovered the 4Cats Workshops at Capitol Hill in Burnaby.  It is close to SFU and when I saw the Polar Bear Mug was the mug of the season, I invited a girlfriend who invited more girlfriends and then there were four of us going to the Polar Bear Mug workshop at 4Cats.  I was even able to find another coupon to use.  

This was a fun Friday night that flew by quickly because adults are perfectionists and it takes us longer to follow instructions and make our mugs.  That's what I think.  When we first arrived we all sat around a large table and the 4Cats teacher gave us name tags and the clay supplies.  Then she went through each step and the class followed.  I have to admit that everything was going well until it was time to add the mug handle.  It was hard, and then my clay started cracking and I had a lopsided handle that fell apart.  In the end I asked the teacher to do it for me.  Yes, I'm not afraid to ask for help.  Thankfully she did so I had enough time to paint my mug before the class was done.  

Now my Polar bear mug is curing so I'm not sure what the final results will look like.  If you are looking for an event for your girlfriends, then check out Capitol Hill and the adult workshops.  I know that kids love 4Cats but I never knew it could be fun for adults too.  


Saturday, November 05, 2016

Vancouver Event - Renfrew Community Craft Fair

National Blog Posting Month in November
#NaBloPoMo Day 5 - Renfrew Community Craft Fair

Everyone has different holiday traditions and one of mine is participating in a local community craft fair.  It is a way to bring handmade jewellery and crafts to life by giving them a new home to someone who falls in love with what I make.  Renfrew Community Craft Fair has been home to my craft fair goods every year.  I invite everyone I know and it is also a way for me to catch up with friends and have mini reunions with everyone as they shop for local handmade Christmas presents.  

It is a good time to get away from the pushy malls and instead take a look at crafts that people have made with love in a local community.  I find the community is friendly and often I find customers who recognize my table from previous years.  That is what happens with traditions!  People know how to find me and my earrings.  

This year I've invited my friend Taslim to share my table and I'm looking forward to see what craft uniqueness she will bring.  Plus I have an opportunity to spend the day with a long lost friend.  

Save the date!  Saturday, November 26th from 10am - 3pm at Renfrew Park Community Centre in Vancouver, BC.  

Sign up on Facebook (Admission is FREE) - https://www.facebook.com/events/333621707014959/

Earrings are my specialty and you can find some of the pearl, skull, coin earrings below.  I'll also have painted gift boxes, felt cutlery stockings, and more!  Still have 3 more weeks to prepare so there may be a few surprises.


Saturday, November 14, 2015

Vancouver Event: Buddha Woodha Jewellery Class

Hello Vancity Girlfriends,

It's Social Shopper Saturday!  I love coupons and I have to admit had a bit of a couponing addition.  I'd buy the Social Shopper, Living Social, or Groupons and would just collect them.  There was a fascination to buying and getting such a great deal!  Then after I had the coupon I would often forget to book ahead of time or to use it.  Yes, it's a bad habit of mine.  Luckily I have learned my lessons so I'm more careful.  I make the reservation right after purchasing.  And with the new Canadian laws, the price that I paid for the coupon never expires.  


I love beading and crafting but the bead stores are so far away in Vancouver or Granville Island.  When I saw the Buddha Woodha Jewellery Making class, it was a good deal and so close to home in Burnaby at the local community center.  I couldn't resist and made a reservation for their ring and pendant class in October.  It's pretty amazing how much you can do in a 90 minute class.  We made two rings and one stone wrapped pendant.  I learned some new skills and had fun!  

They are having another class on wirework now that is offered on Social Shopper with Buddha Woodha.  It is the same deal that I got which is $29 per class for one person or $49 for two people.  My advice is to book your class early.  

Buddha Woodha Jewellery Making Class - Rings and Pendants


Sunday, March 29, 2015

Crafternoon: Hershey Kiss Roses


On a Sunday afternoon, I decided to turn it into crafternoon, unplug and create something new!  I found this craft idea on Pinterest and loved it because it is simple and easy to make.  You can make these for Valentine's Day, Mother's Day, or for your Teacher's Gifts, or Gratitude Gifts.  You do not need a lot of materials to create something that is pretty and great for those chocolate lovers on your list.  

1)  Hershey Kisses
2)  Cellophane paper - since my kisses were pink, blue, and green, I had a transparent colour for the cellophane wrap
3)  Stem leaves
4)  Stem wire
5)  Floral tape

You can do variations of this with what you have but the idea is to basically take two hershey kisses and wrap them together so they look like rose buds.  Then you use the floral tape to add the stem and wrap it down the wire.  Voila, you have yourself a Hershey Kiss Rose.  


Shopping tip:  Check out your dollar stores, or if you want to shop it all at Michaels which is what I mostly did, then don't forget the online Michaels coupons.  


Sunday, October 26, 2014

Crafternoon: Halloween Bags for Kids

Dear Vancity Girlfriends,

Well, it Halloween is around the corner on Friday, October 31st and I volunteered to help Vancity Girlfriend Carolyn prepare the Halloween bags she would give to the kids in her son's class.  Halloween Day is also his last day of daycare so we prepared special Halloween bags with lots of goodies inside for all 30 of his classmates!  WOW!  That was a Halloween assembly line for sure! 

I love crafting so I happily volunteered to spend a crafternoon preparing the bags.  We started with orange gift bags which I drew a tag on with a black sharpie that read "From Toby".  Then it was Halloween sticker time.  We added stickers to the front of each bag.  That was our simple Halloween decoration.  

Now it was time to fill the bags.  We put a bit of black "easter" paper at the bottom of each bag and filled the bags with treats such as Halloween tattoos, Hello Kitty or Halloween pencils, chocolate bar or smarties, Angry birds lollipop ring, Halloween clappers or rings.  Fun times preparing Halloween gift bags for kids!  Happy Halloween!

Kids Halloween Gift Bags


Halloween Bags with Stickers

Wednesday, October 22, 2014

Crafternoon: Baad Anna's Crochet Class

Hello Vancity Girlfriends,


I love learning new crafts and taking classes which is how I learn best.  My girlfriend found a place that had crochet lessons for beginners and intermediate all in one.  So that's a good sign since I'm a beginner, since I can never remember how to start a slip knot which I need to start my chain for crocheting.  

Beginner Crochet Class - Wool Cowl (just starting)
Baad Anna's is a local shop that offers knitting and crocheting classes on a sliding scale which is nice.  The wool is pretty, okay, I'm obviously not a wool and yarn expert, but I found it interesting that they do have a supply of Canadian wool.  

They have a table at the back of the shop for the classes and there were about 8 students in the class.  The classes run over four 2 hour sessions in October.  The students were friendly and from a variety of crochet levels.  There were some ladies working on their individual projects such as baby booties, or crochet lace sweaters and then the rest of us who were learning the beginning crochet stitches.  It is inspiring to see what else can be crochets other than scarves.  The best advice that they told me was to just experiment and trial and error.  

Don't think that you can't do it or that's it's too difficult, just pick up the supplies and follow step-by-step and do your best!  

Baad Annas's Website:  http://baaadannas.wordpress.com/classes/

Monday, October 20, 2014

Crafternoon: Border Buddy Cardmaking Class

Hello Vancity Girlfriends,

Now I love crafting as you know and learning about new crafts.  I was searching on the internet for a cardmaking class and stumbled upon a Stampin' Up demonstrator in Canada who had a studio nearby in New Westminister.  It is through my internet surfing that I discovered the Border Buddy Cardmaking class.  It peaked my interest because it was closeby, the cost was only $20 (and if you place an order of $40 or more, the class is free).  That was definitely a selling feature for me.

I wanted to take a card making class for a long time but there are not many around.  I don't have any friends who enjoy this craft.  So I decided to bribe my friend who lives in New Westminister to come to the class with me so we could both try something new.  

The studio was in the basement of a house and there was a long table with friendly guests when we arrived.  Taking classes are great because you don't have to do anything.  All of the materials are already prepared and she guides you step-by-step through the process.  Also the Big Shot paper cutter and framelits were there for us to use.  

I was really happy with how easy it is to do stamping and card making.  The group of women in the class were super friendly and supportive.  We were the beginners of the group but we were able to leave with four beautiful cards in a night.  There were five of us making cards all together so a nice small group.

Now I have my eyes set on more cards for the upcoming Winter Watercolour card making class in November.  Stay tuned as I'll share my new craft adventures with you and let you see what I've ordered when it arrives.  


Stamp Crazy With Alison Website
(Click on the top page 'Classes' to see what classes she will have each month).

Sunday, October 12, 2014

Crafternoon: Janome Sewing Machine

Hello Vancity Girlfriends,

This Thanksgiving while Carolyn is enjoying wine country in Kewlona with her family and touring vineyards such as Quail's Gate Winery and Mission Hill, I am at home being a homebody and loving it.  Take a look on Twitter for tweets from Carolyn's BC Wine Tour.  

So my biggest decision and purchase this weekend has been the new sewing machine debate.  We had an antique sewing machine which was beautiful in its own ways with all metal components that still works for decades.  This made the machine very heavy and since it was likely from the 60s, there was no manual.  Most sewing machines you can figure out and after I took my Spool of Thread sewing class, you can imagine that all I wanted to do was sew reversible tote bags with ease.  After sewing a few bags, the antique machine started to test my patience since it was difficult to thread the bobbin.  

I know, you're thinking, that's the easiest part.  Well not for an antique machine where you press on the bobbin wheel that is against another wheel and the friction of the two wheels turning are supposed to thread a bobbin smoothly.  With its age, this one simple task, I could not do easily.  Imagine spending twenty minutes trying to thread a bobbin.  Well, that was the last straw for me.

I decided that I needed a new sewing machine and I was worth it (of course, my work bonus helped along the way)!  The first step is I asked my friends on Facebook to see what suggestions they had.  I had two sewing friends and they both had Janome machines that they bought over 5 years ago.  That was a winning feature!  After all if I am going to buy only one machine, I wanted to make sure that it lasted.  Nowadays you have the option of mechanical versus computerized machines.  I found a comparison chart here:  http://janome-sah.com/compare-products

Did I tell you that I'm a beginner?  Well, some of the language in the comparison chart is Greek to me.  What most people told me is that mechanical machines will last longer than computerized ones.  Is this true?  Who knows, but at least I knew that mechanical would be similar to the antique one I was using from the 60s.  After this research I knew what I wanted.  

So on this Thanksgiving weekend, I went to the family owned Pfaff Sewing Store on Granville and 8th and I have to say that they have impressive customer service.  I was politely greeted and my questions answered.  I knew that they sewing machines would be on sale as it said on the website so I paid $299 for my machine which is a high end mechanical Janome machine.  That included everything that I would need with the machine; bobbin, case cover, different feet, 1 step button hole, 12 different stitches.... well what I really wanted was a top of the line mechanical machine that will last me for years to come.

Success!  Best thing about Pfaff on Granville, other than the fact that they are family owned, is that they offer free classes anytime if you have questions about the machine.  Now after bringing the machine home, I can see why they would offer that.  Sewing machines in general are pretty simple and with a manual in hand, I can continue to sew my reversible tote bags.  

I tell you it's night and day with this lightweight sewing machine, the bobbin took me minutes to thread and everything else fell into place.  I had to resew my tote bag whose threads were falling loose too.  I'm a happy camper with my new Janome sewing machine.  

I'll let you know my next crafternoon sewing project adventures.  

Thanks for reading!
Janome Sewing Machine

Threading the Bobbin

12 Stitches

Saturday, September 27, 2014

Crafternoon: Spool of Thread Sewing Lounge - Reversible Tote Bag

Hello Vancity Girlfriends,

I love learning new crafts, perhaps it is old fashioned, but I feel crafting is artistic, creative, and can be a lost art.  Now a year ago or maybe more, a colleague told me about the Spool of Thread Sewing Lounge in Vancouver.  Of course I do what I normally do, which is ponder, and wonder and not take any action even though the idea of learning how to sew sparked my interest.  A year later and a new colleague has finished taking the tote bag class there.  WOW!  

Did I really procrastinate for over a year?  I had looked at their class schedule on their website hundreds of time.  Finally, I bit the bullet and decided to take the Spool of Thread Tote Bag class in August.  It is a beginner class that reviews the basics of how to thread a sewing machine and make a very cool and chic reversible cotton tote bag. 

Spool of Thread made sewing seem easy and fun!   And best of all you come out of the class with a finished product, pattern and instructions so you can make it again.  Now that is worth the class fee of $40 for a three hour class.  There are seven spaces in a class so you there is individualized attention no matter what your sewing level is.
Spool of Thread Tote Bag #1

Spool of Thread Class Schedule

Taking this tote bag class did not spark, but ignited my interest in sewing.  I dug out our antique sewing machine to make more reversible tote bags.  The last time I took a sewing class, I forget how to make what I made in class because I did not try it at home.  I did not want this to happen to me again especially since I paid around $70 for the class including around $30 for my supplies of fabric and thread.  Of course, you can be more organized and bring your own to keep your cost down.  After a year of procrastinating, I did not want to lose my new skill.

This is my first reversible tote bag from the class which I will keep and cherish.  But I did not stop with just one.  

Tote Bag #2 - Pears Please


Tote Bag #2
Here's the second tote bag that I made using fabric that I bought in the states from Joanne's Fabrics.  Pears for my friend, Vicky's, September birthday.


Tote Bag #3 - Pears and Apples


Tote Bag #3

Another birthday tote bag was for my friend Christen's September birthday. 

The Pears and Apples fabric is from Joanne's Fabrics.  

I made the tote bag challenge for myself to see how many I will make.  There are so many fun cotton fabrics to play with.  The idea began because when I was stocking up on fabric at Joann's Fabrics when I was asked me, "How many are you going to make?  100".  I replied "Yes!".  What was a fun question has turned into a tote bag challenge for myself.   Follow me here for the #Totebagchallenge.  

Thanks for reading and come back again to see how I am doing with my tote bag challenge!  

Thursday, May 15, 2014

DIY Breakfast Box: Girlfriend Surprise Subscription Box

Hello Vancity Girlfriends,

Subscription boxes became a fad for us and even though we still explore them, our latest for this year is to make our our DIY Girlfriend Surprise Subscription Box.

Without a camera, I still couldn't wait and opened up my DIY Breakfast Box.  Vancity Girlfriend Carolyn remembered that every time I opened up the Snack Box I raved about the different breakfast items to try.  Yes, breakfast is my weakness.  So let's see what was inside.


It's a George Foreman Personalized mini grill!  I didn't have to open it up, I know what a grill is for.  I can cook breakfast sausages, burgers, and other meats.  It's a little odd for someone to get me a grill.  So I put it aside in my kitchen.

Then Carolyn writes on a piece of paper "Maria's Box".  Umm, what does this mean?  "It's your suprise box!"  Ohhh...lights go off in my head.  It's not a George Foreman Grill.  

Now really let's take a look inside the box on the outside to see what breakfast themed items are inside.  


Starbucks Salted Caramel Hot Chocolate

Kind protein bars

Quaker Instant Oatmeal

Quaker Crunchy Granola

Kellogs Morning Protein Shake

Dole Fruit and Crisp Breakfast Cups
These are perfect for my early morning weekday breakfast!  I run out the door everyday but now I can still have breakfast on the go or at my desk.  Lots of variety and it's lasting me all week with more for the weeks to come!  WOW!  I love this breakfast themed DIY Surprise Subscription box.  
Surprise your girlfriend today with a DIY Breakfast Box.  


Monday, April 21, 2014

Crafternoon: Damask Love Watermelon Mini Cards

Hello Crafty Vancity Girlfriends,

I'm starting to get into paper crafts which also include card making.  Since I'm a beginner, I wanted easy projects that I can complete within minutes so I can have the satisfaction and rewards of completing my projects.

When I discovered Damask Love blog, I fell in love with the simple materials needed for the paper crafts and easiness of their series called "Easy Like Sunday Morning" craft projects which are perfect for beginners like me.  I also didn't want to go out and spend hundreds of dollars on crafting supplies.  Damask Love keeps the projects simple and supplies minimal.  

The first Damask Love project that I decided to tackle were the watermelon mini cards.  They are so cute and adorable that I couldn't resist!  

Every week Michaels Craft store has a 40% off a regular item so I just had to go to one place to pick up the supplies that I needed which were a Martha Stewart Circle cutter, card stock, and gel pens.  (On Damask Love blog they used black glitter glue but that was expensive so I decided to stick with a black gel pen.)  

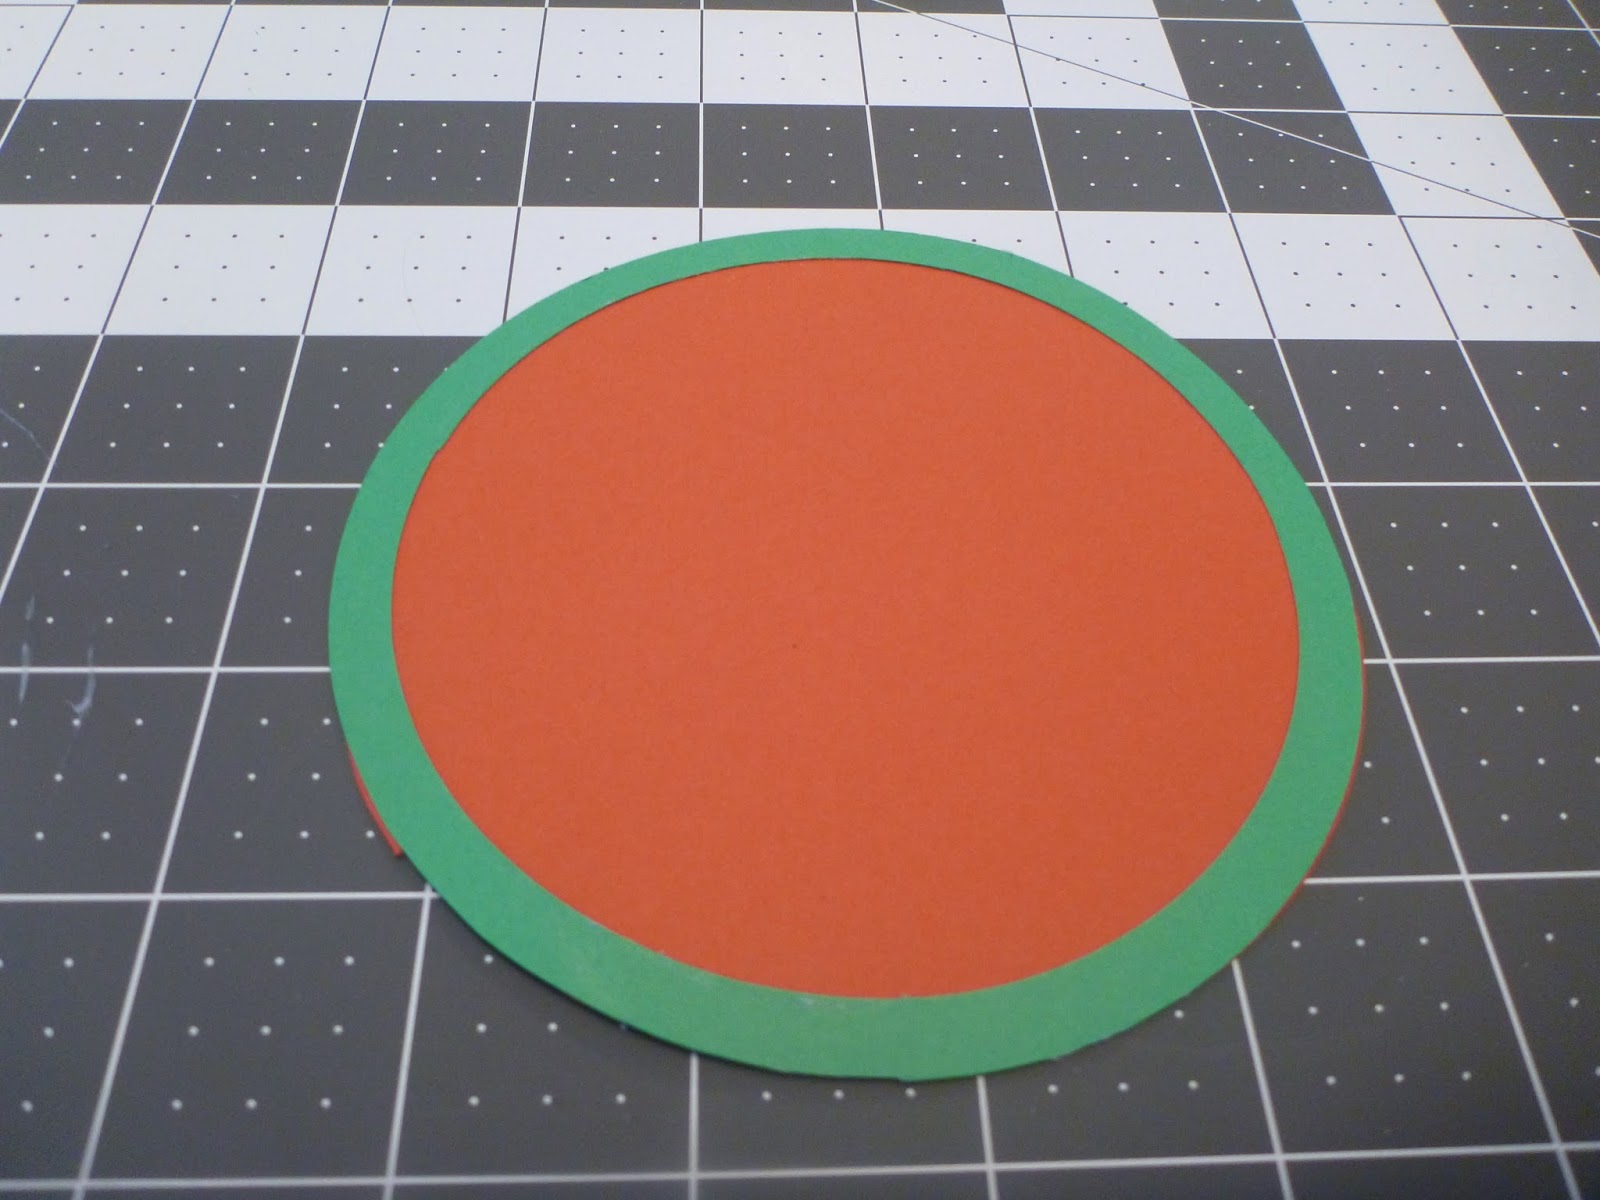
Step 1:  Cut red 5" circle and green rind same size as your red circle and 1/2 inch less to make the rind.

Step 2:  Glue the green rind on top of the red circle

Step 3:  Cut in half.  This will make 2 mini cards.

Step 4:  Fold each in half.  

Step 5:  Line the edge of the green rind with your white gel pen.

Step 6:  Draw watermelon seeds with your black gel pen or glitter glue.
Watermelon mini cards can be used for "thanks a melon!" thank you cards to teachers with a summer themed gift.  Or if you are hosting a summer party, use the cards as name cards, or as thank you cards for the "goody bag."  They are so cute that I'm sure everyone will love them.  Perfect timing for upcoming summertime fun and birthday parties or summer parties.  

Tuesday, December 31, 2013

Subscription Boxes: DesignHerKit Review

Hello Vancity Girlfriends!  

As you know I LOVE beading and jewellery making! Now when I first discovered Whimseybox which is a monthly craft subscription box for $20/month, I was in awe that you can have a craft with all of supplies in a box.  However, over time, I discovered that I had crafts that were left undone because I didn't know much about that craft.

That led me on a journey to self discovery that I don't just like ANY craft, I really LOVE beading and jewellery making!  Then I found DesignHerKit which is a monthly subscription box for exactly that!  DesignHerKit is a Canadian company and I scooped the offer when the start up business was gathering funds to operate through Indiegogo.  I loved the fact that it's a box from CANADA.  So for a change, there are no extra shipping fees for Canadians.  

DesignHerKit is affordable at $19/month.  The kit comes in a gold foil envelope and inside are all of the supplies that you need to make three projects.  Here's what I received for my first DesignHerKit January 2014. 

DesignHerKit Arrives!

Supplies and Instruction Sheets

Three projects photo

Supplies for Keychain

1st project:  Keychain

2nd project:  Bracelet

3rd project:  Necklace

DesignHerKit Competed Projects

 In one afternoon, I finished all three projects!  I'm an experienced beader so I could work with the photo to put together the projects, however, I did notice that if you are a beginner, you can go to the DesignHerKit Craft Table that will have step-by-step instructions on how to complete the pieces.  I found that the projects were simple enough for all levels.  

The best part is that I have inspiration for jewellery and a groovy necklace that I've already started wearing.  Fashion forward and friendly!  

I love this Canadian subscription box and I can't wait for my next DesignHerKit. 

Thursday, November 28, 2013

Living Social Coupon: Paint Nite Vancouver

Dear Vancity Girlfriends,
As you may already know, I love a good deal!  So that's when the group buying coupons come into play.  It's bad because in the past I've been so obsessed with buying coupons, that I even forgot to make reservations to actually use them before they expire.  Now I know better!  If I'm actually buying a coupon, I basically make the reservations immediately.  Due to the popularity of the deal, you have to plan ahead!  

Bird on a Wire from November Paint Nite
That's exactly what we had to do for Paint Nite Vancouver at the Ascot.  Paint Nite is a night where you can get together with your Vancity girlfriends at a local pub restaurant (in this case the Ascot) and have a drink and paint at the same time.  

With the $25 Living Social coupon your canvas, painting supplies and instructions are all included so you leave Paint Nite with a painting you can hang on your wall.  (alcohol is not included and optional but you know what will happen when Vancity Girlfriends go;)  It's an easygoing atmosphere so you have the choice to follow the instructions or to let your creative juices guide you.  Either way at the end of the night you have a finished painting that you've completed all on your own.

Now we want you and your girlfriends to come and join us at Paint Nite Vancouver on Saturday, February 22nd to paint Hot Pink Flowers!  Spaces are filling up!

After you buy the Living Social coupon, you need to go to the Paint Nite website to make the reservation and enter the coupon code from living social.  There will also be an additional $3 fee for taxes.  Do this right away as you'll notice the dates fill up and get SOLD OUT!  quickly.  Don't worry about making a reservation three months in advance, their customer service is excellent and you can always change your dates if something comes up.  

Step 1:  Buy the Living Social Paint Nite Coupon 
Step 2:  Make the reservation on Paint Nite Vancouver website
Step 3:  Come to Paint Nite!  Enjoy!  Come find Vancity Girlfriends!

Wednesday, November 27, 2013

Social Shopper Coupon: Make It! Vancouver The Handmade Revolution

Hello Vancity Girlfriends,
This is a merry time of year with lots of Christmas Craft fairs in Vancouver to choose from.  It's hard to determine which craft fair will give you best bang for your buck so to speak.  It's an event to check out local crafts that may be suitable for your Christmas list but also as something to do with your girlfriends.  I'm a holiday craft fair browser myself.  I like browsing and getting ideas and sometimes if something catches my eye, I may buy.  For the hesitant shopper like myself, the Make It! Vancouver (The Handmade Revolution) is a good craft fair because the ticket is good for the whole weekend.

That's exactly why I'll go on opening day and then I will have until Sunday to decide whether or not to return to pick up any items.  This year the Make It! Vancouver has changed to a larger venue at the PNE Forum so this is quite exciting.  I'm not a big fan of crowds so the PNE will easily have enough space to browse leisurely at the 250 exhibitors.  I have my fingers crossed that they have some food options as well.  I'll let you know in my review after I attend on Thursday night.  

Best deal on tickets is to get the Social Shopper 2 for 1 coupon!  
It's $7 for two 4-day admission to Make It! Vancouver.
Click on "Today's Deal" and scroll down looking at the right hand side for the one for the Make It! fair.  

If that's too complicated you can always go to Make It Vancouver and buy the early bird ticket for $4 each.  You only have a few days left since the fair begins on Thursday!  Come back to see my review of Make It! Vancouver 2013.